
How to Make Large-Scale Communal Art for Chruchs
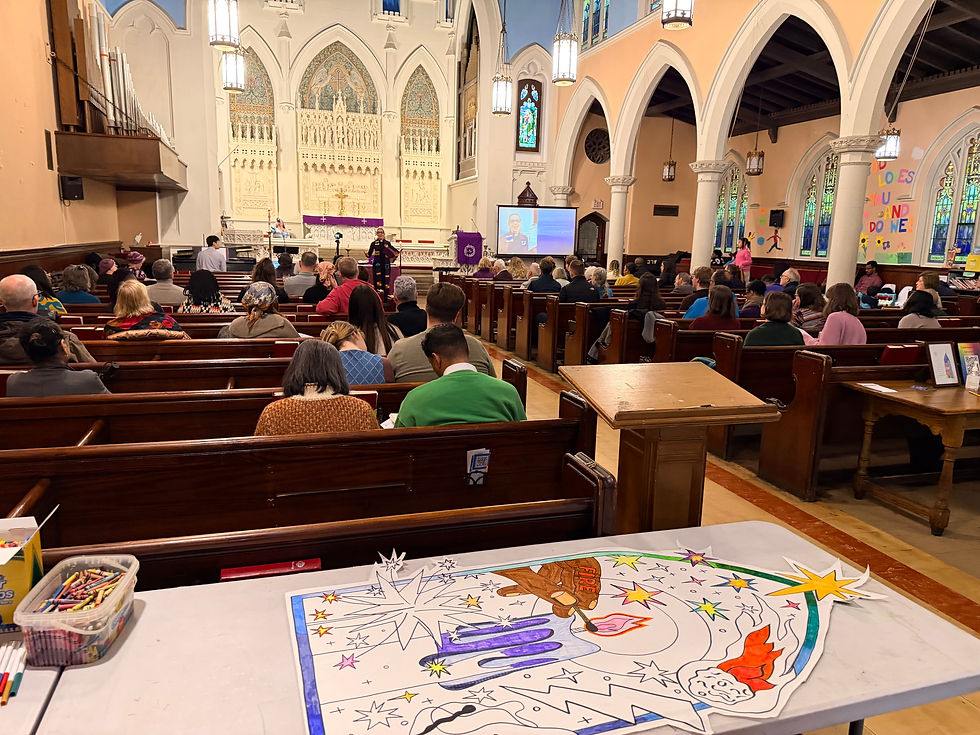
This Lent, my congregation at Advent Lutheran Church in Manhattan created a series of large paper “stained-glass” illustrations together. Each week, people of all ages were invited to color a banner connected to that Sunday’s theme. Some people colored quietly. Some talked and laughed around the table. Toddlers scribbled. Elders filled in stars. And by Easter Sunday, we finished the project by adding paper lilies to the altar.
In my last post, I wrote about how powerful this became as a community-building practice: a way to slow down, create together, and let worship settle more deeply into our bodies. This post is a little more practical. I want to show you how I made the illustrations, so other churches can try something similar in their own spaces. (Maquina37)
What We Made
The project was simple: large black-and-white illustrations printed at banner size, taped together, traced onto large white paper, and then colored by the congregation over several weeks.
The final result looked like stained glass, but the materials were very accessible: paper, tape, markers, crayons, and a lot of Sharpies.


Supplies
Here are the basic materials I used:
Large roll of white craft paper, about 36 inches wide
Regular 8.5 x 11-inch printer paper
Printer
Clear Tape
Painter's Tape
Light box or light pad
Sharpie markers
Crayons, markers, or colored pencils for the congregation
Optional: iPad, Canva, Adobe Acrobat, scanner, or any drawing app
For paper, something like this 36-inch white kraft paper roll would work well. I found a 36” x 100’ white kraft paper roll from Bryco Goods on Amazon. (Amazon)
For tracing, an affordable A3 light pad/light box should be enough for most churches. You do not need anything fancy. A3 is a helpful size because it gives you more space than a standard letter-sized light box. Amazon has several A3 tracing light pads, including USB-powered and rechargeable options. (Amazon)
Step 1: Create Your Illustration
I created my illustration on my iPad. I kept the drawing as simple black line art, with large open spaces for people to color.
When designing for communal coloring, I recommend keeping a few things in mind:
Use bold, simple lines.
Make the spaces large enough for children and adults to color comfortably.
Avoid tiny details unless you want them to be optional.
Think about the theme of the worship season, scripture passage, or congregational story.
Leave room for people to add their own creativity.
You do not need an iPad to do this. You can also:
Draw the illustration by hand and scan it.
Take a clear photo of a hand-drawn image.
Create a simple design in Canva using free line-art elements.
Ask an artist in your congregation to draw something.
Use shapes, symbols, or repeated patterns instead of a full illustration.
The goal is not perfection. The goal is to make something your community can enter into together.
Step 2: Enlarge the Illustration
Once I had the illustration, I uploaded it to Canva and enlarged it to banner size.
Later, I found out that Adobe Acrobat can also do this by printing a large image or PDF as a “poster.” Adobe describes this as a tiling feature, where one large page is split across multiple regular sheets of paper. In the print settings, you choose Poster under Page Sizing & Handling, adjust the tile scale and overlap, and Acrobat calculates how many pages you need. (Adobe Help Center)
This is helpful because most churches do not have access to a large-format printer. With this method, you can print a big image using a regular home or office printer.
Step 3: Print the Image in Sections
Print the enlarged image onto regular 8.5 x 11-inch paper.
When printing, I recommend:
Printing in black and white.
Using draft mode if you are only using the printout as a tracing guide.
Adding a small overlap between pages if your software allows it.
Numbering the pages lightly by hand if they print in a confusing order.
Laying everything out on the floor before taping.
This part feels a little like putting together a puzzle.


Step 4: Tape the Pages Together
Once all the pages are printed, tape them together to create one large image.
A few tips:
Trim page edges if needed.
Line up the design before taping everything down. (I found the light box helpful to line up the design)
Use clear tape to hold the pages together.
Do not worry if it is not perfect. You are going to trace over it.
At this stage, you will have a full-size paper version of your illustration.


Step 5: Trace the Image Onto Large Paper
Next, place your large white craft paper over the printed template and trace the design.
I used a light box to help me see the lines underneath. Since the paper was large, I moved the light box section by section under the drawing as I traced.
This part was time-consuming, and I used many Sharpie markers—lots of Sharpies, lol. But it saved money and helped me develop a technique I can now share with you.
A few tracing tips:
Tape the large paper down so it does not shift.
Start with the biggest lines first.
Move slowly across the image in sections.
Use fresh Sharpies so the lines stay bold.
Keep extra markers nearby.
Let the ink dry before rolling or moving the paper.
You can also skip the light box if your printed template is dark enough to see through the paper. Try taping the template and craft paper to a bright window, or use a projector if your church has one.
Step 6: Invite the Congregation to Color
Once the illustration is traced, you are ready to invite people in.
You can place the banner:
On a table after worship.
On the floor with cushions for children.
Along a wall.
In the fellowship hall.
Near the sanctuary entrance.
In a prayer station.
For our project, the coloring itself became a spiritual practice. Some people talked. Some people colored quietly. Some people only added a little color and moved on. Others stayed for a long time.
That is part of the beauty of communal art. There is room for different kinds of participation.
Step 7: Display the Finished Piece
When the coloring is finished, hang the artwork somewhere visible.
You might display it:
In the sanctuary.
Near the altar.
In the fellowship hall.
Along a hallway.
As part of a seasonal worship installation.
During Holy Week, Easter, Advent, Pentecost, or a congregational celebration.
For Easter Sunday, we added lilies to the altar as the final piece of the project. It felt like the whole congregation had helped bring the space to life.
Why It Was Worth It
This method took time. It was not the fastest way to make large-scale art. But it was affordable, flexible, and possible with materials many churches already have.
More importantly, it gave us a way to create something together.
The finished artwork was beautiful, but the process mattered just as much. People gathered around the table. They noticed one another’s choices. They shared stories. They made space for silence and conversation. They colored their way through Lent and into Easter.
And for me, that was the real gift. Not just the banners. The community that formed around them.
If your church tries this, I would love to see what you create. You can tag me on Instagram or send photos my way. I am always amazed by what happens when people are given a little paper, a few markers, and permission to make something together.
Comments